

This raspberry sorbet is the ultimate summer treat! It's light, refreshing, flavorful, and can easily be made without an ice cream maker.
Just like these strawberry lemonade popsicles, this creamy homemade raspberry sorbet is the perfect sweet treat to enjoy on a hot day. It's creamy, tangy yet sweet, and a healthy-ish alternative to ice cream.
I love this recipe because it's so simple and customizable. I know this recipe is a raspberry sorbet, but you can use just about any fresh fruit you love! Let's get cooled off, shall we?
Jump to:
Why you'll love this recipe
- This is a no churn raspberry sorbet recipe, meaning you don't need an ice cream machine! It only requires a food processor and some freezer time.
- You only need 4 basic ingredients, most of which you already have on hand, and it's easy to make.
- Sorbet is a healthy-ish alternative to ice cream, as it's naturally lower in calories, dairy-free and gluten-free.
- It's the perfect summer dessert! Raspberry sorbet is so refreshing on hot summer days but it's also the perfect treat whenever you're craving something sweet.
- It's customizable - you can use any fruit, fresh or frozen, that you like.
Equipment
Since we're not using an ice cream maker, there are a few tools that'll give us the creamy result we expect for sorbet:
- Food Processor or blender
- Large Fine Mesh Strainer
- Loaf Pan or any shallow container
- Measuring cups & spoons
Ingredients
This simple raspberry sorbet only calls for handful of simple ingredients that you likely already have on hand:
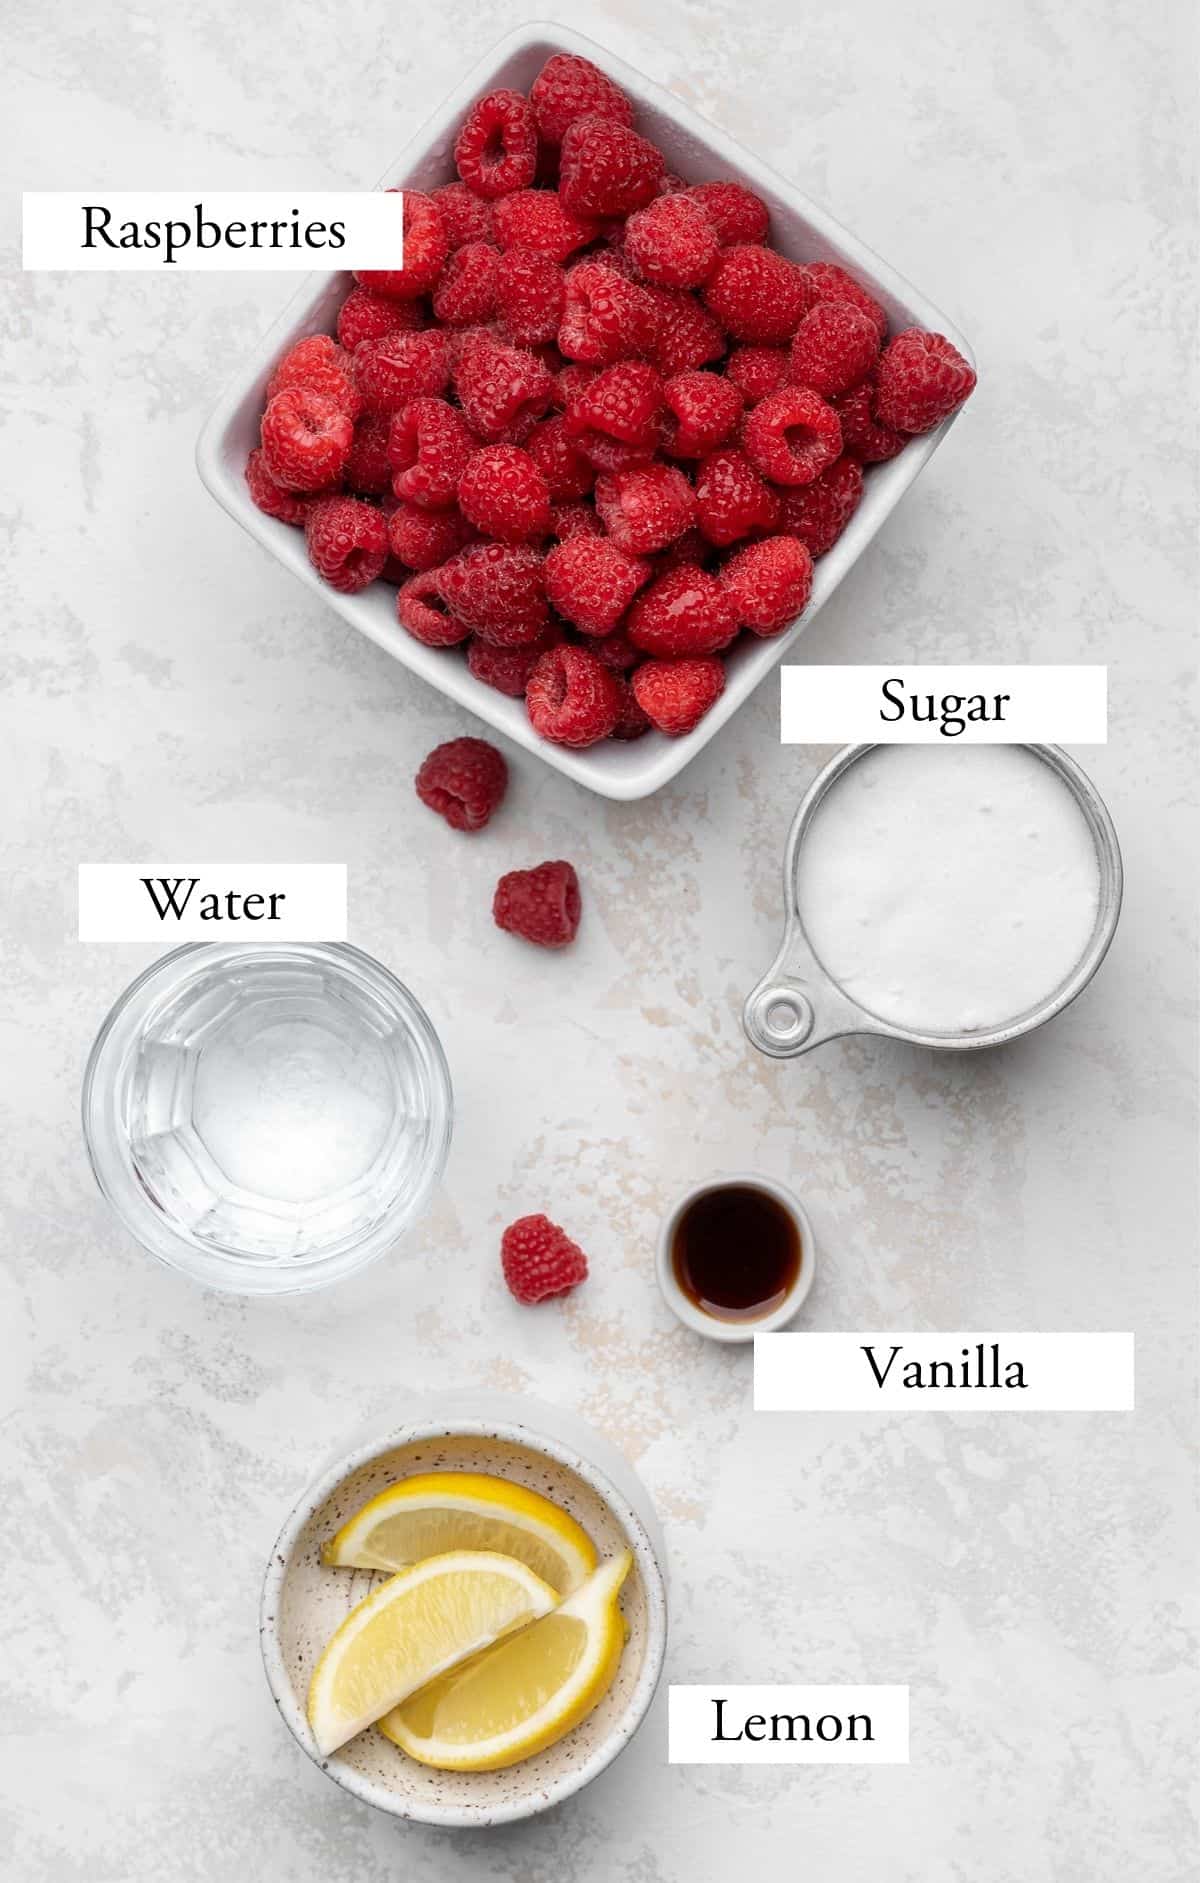
- Raspberries: fresh, ripe raspberries are the heart and soul of this recipe. You can definitely use frozen raspberries but I like fresh works best! Unlike other sorbet recipes, there is no fruit juice in this healthy sorbet, only fresh or frozen fruit.
- Water: only a little to give the raspberries something to blend into.
- Sugar: sugar is necessary because it lowers the freezing point of water, ensuring that the sorbet does not freeze into an inedible ice cube. Sugar = scoopable sorbet! Also, raspberries are naturally quite tart in flavor, so this will help bring some sweetness to the sorbet. I highly recommend sticking to the amount of sugar noted here, as adding less will make your sorbet too icy while adding more could lead it to not freeze.
- Lemon Juice: to enhance the raspberry flavor and bring out some of that tartness. Lime juice works perfectly too!
See recipe card below for a full list of ingredients and measurements.
Variations & Substitutions
- Make this recipe refined sugar-free by using maple syrup or honey instead of sugar. You could also make an entirely sugar-free raspberry sorbet by using sugar-free maple syrup or a sugar substitute like monk fruit sweetener. Please note this could alter the texture, flavor, and freezing time.
- Switch up the fruit! This recipe will work well with pretty much any fresh fruit or frozen fruit. If you don't love raspberries, I recommend trying this out with fresh blackberries, strawberries, or mangoes instead. If you use mangoes, you may want to add a bit more sugar to enhance the flavor.
- Add more flavor by adding fresh mint leaves to turn this into a raspberry mint sorbet or cutting the amount of raspberries in half and adding another fruit in and turning it into a mango raspberry sorbet, for example!
- Make this a boozy sorbet by adding 1-2 tablespoons of liquor of your choice.
- Create a simple syrup by simmering the water and sugar together in a medium saucepan over low heat until the sugar has dissolved then allow it to cool before adding to sorbet mixture. We essentially do this in the food processor to save a step, but feel free to try it out!
This recipe has not been tested with any other substitutions or variations than the ones listed above. If you replace or add any ingredients, please let us know how it turned out in the comments below!
Instructions
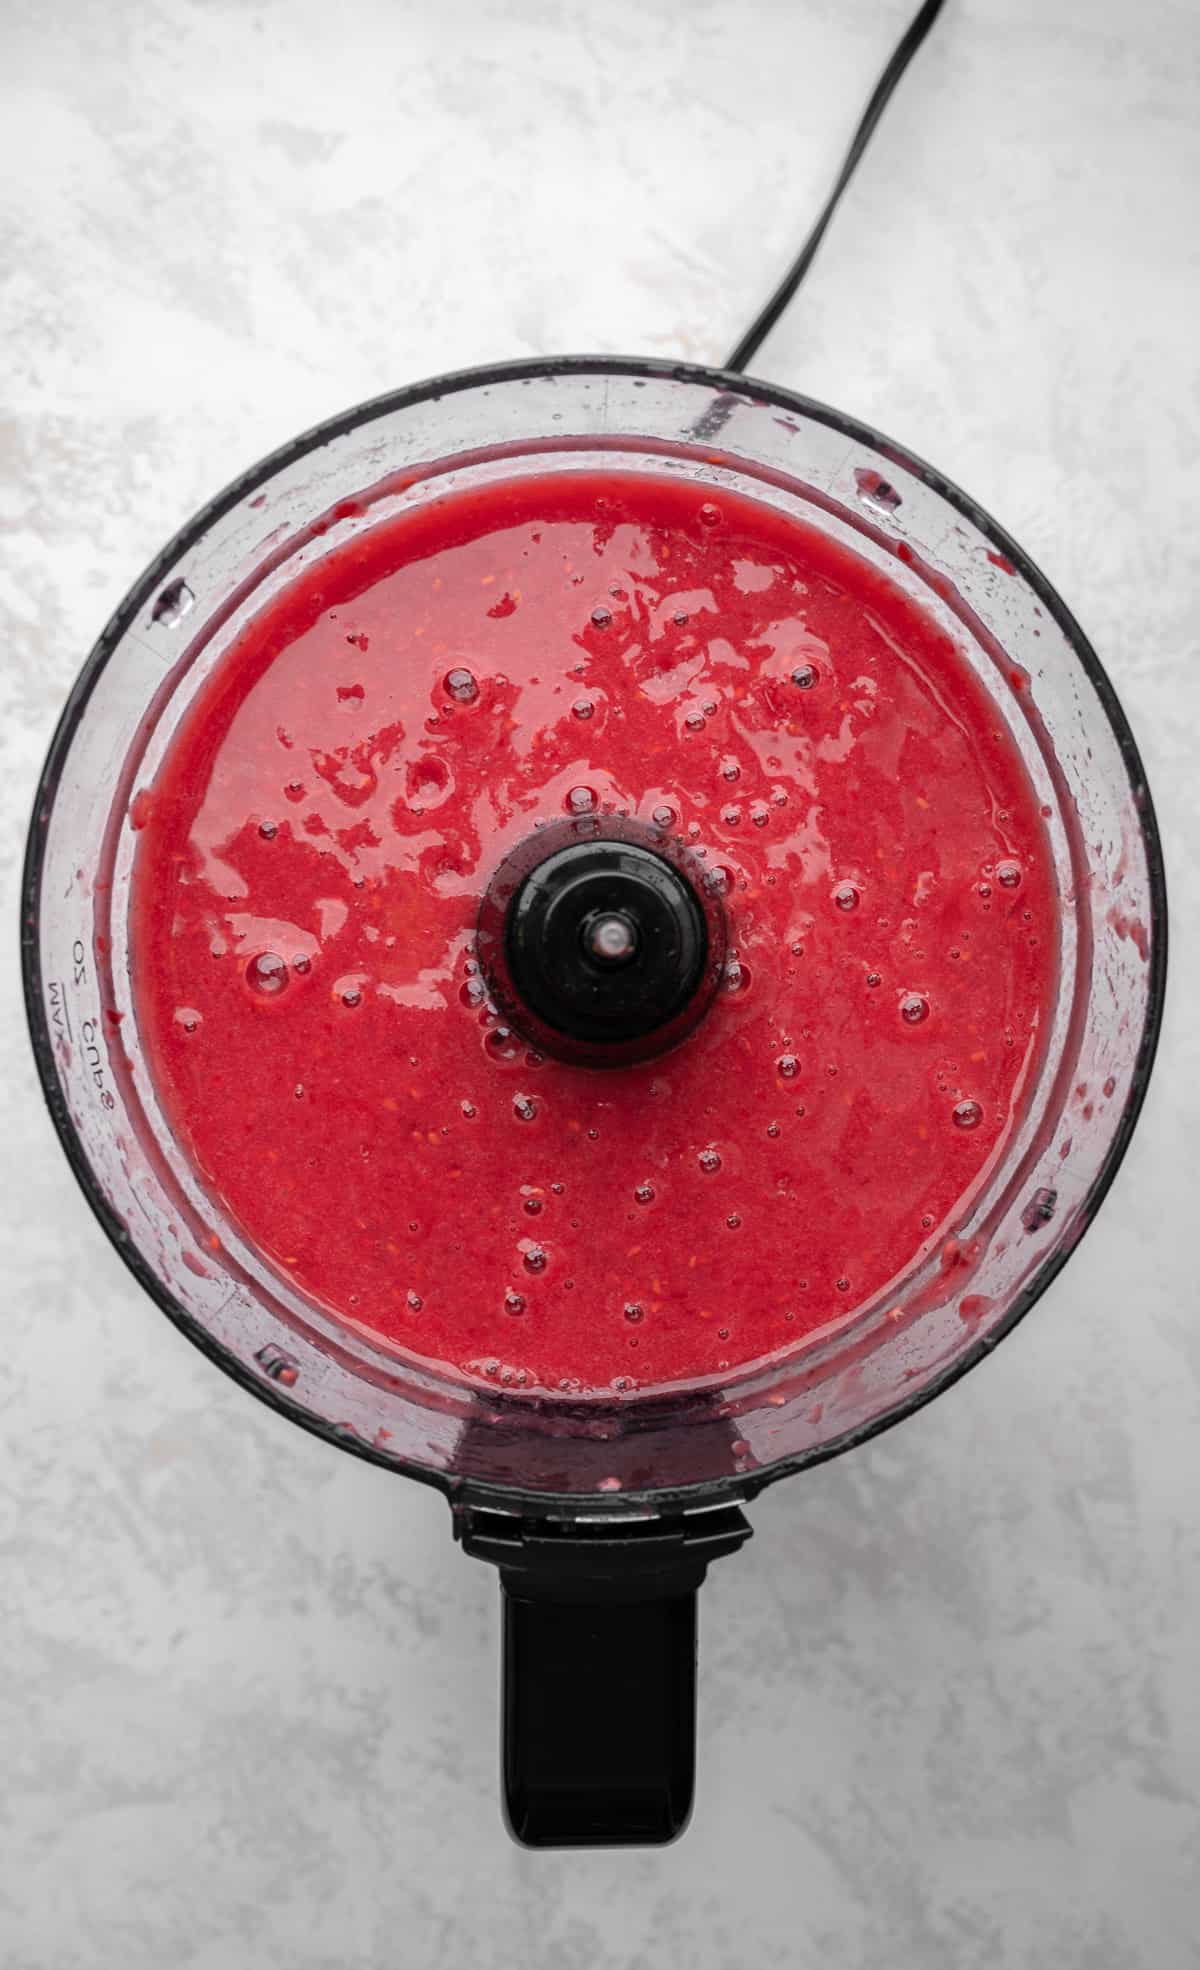
Step 1: To a food processor (recommended) or high-speed blender, add raspberries and water. Blend on high for 2 minutes or until fully puréed. There should be no chunks of raspberries left and will be pretty watery.

Step 2: Place a fine mesh strainer over a large bowl and pour the raspberry puree through. You may need to gently push/scrape the purée through the strainer using a rubber spatula. Discard the seeds.
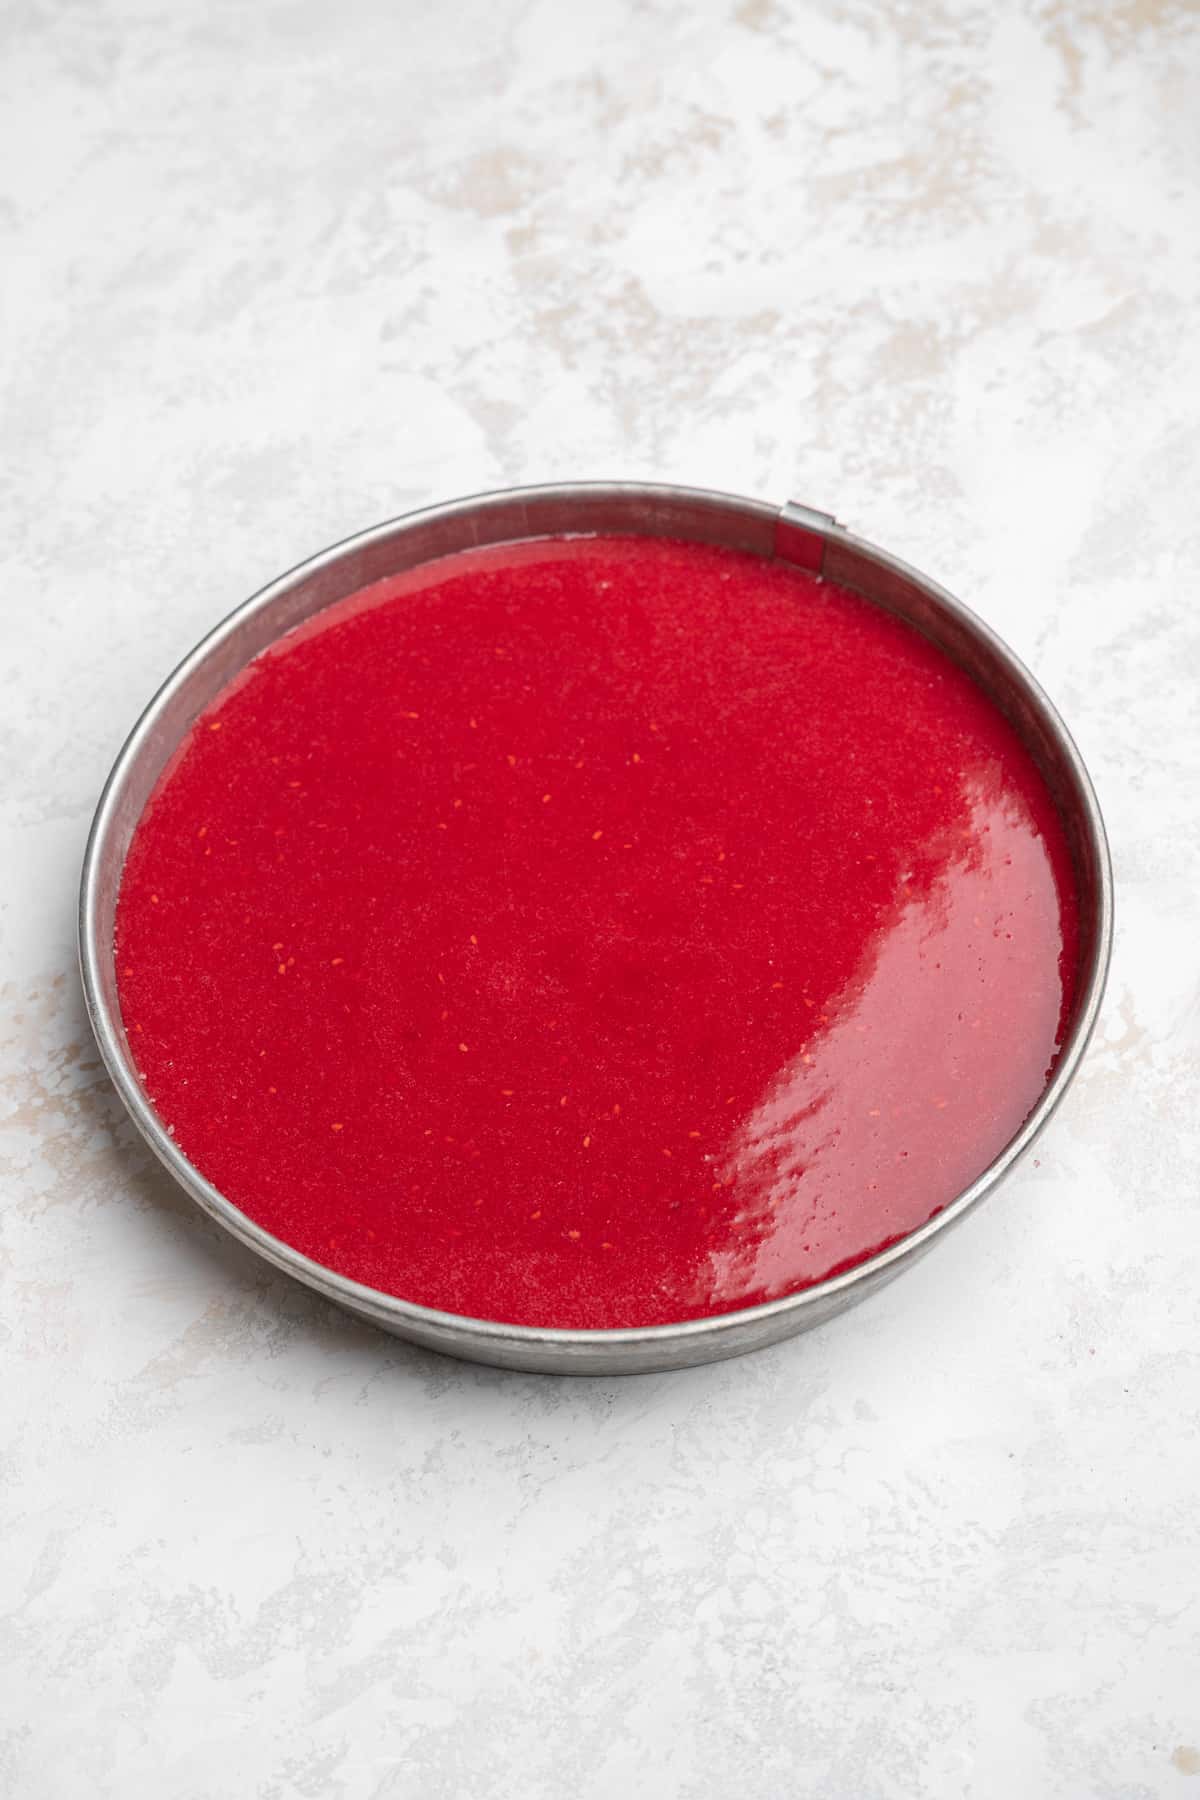
Step 3: Pour the puree into a food processor along with sugar, lemon juice and vanilla. Blend for 1 minute then pour into a loaf pan or cake pan. Freeze for 1-2 hours, or until solid. You can enjoy after it's frozen, but it's a bit icy (still delicious) so I recommend following the remaining steps.
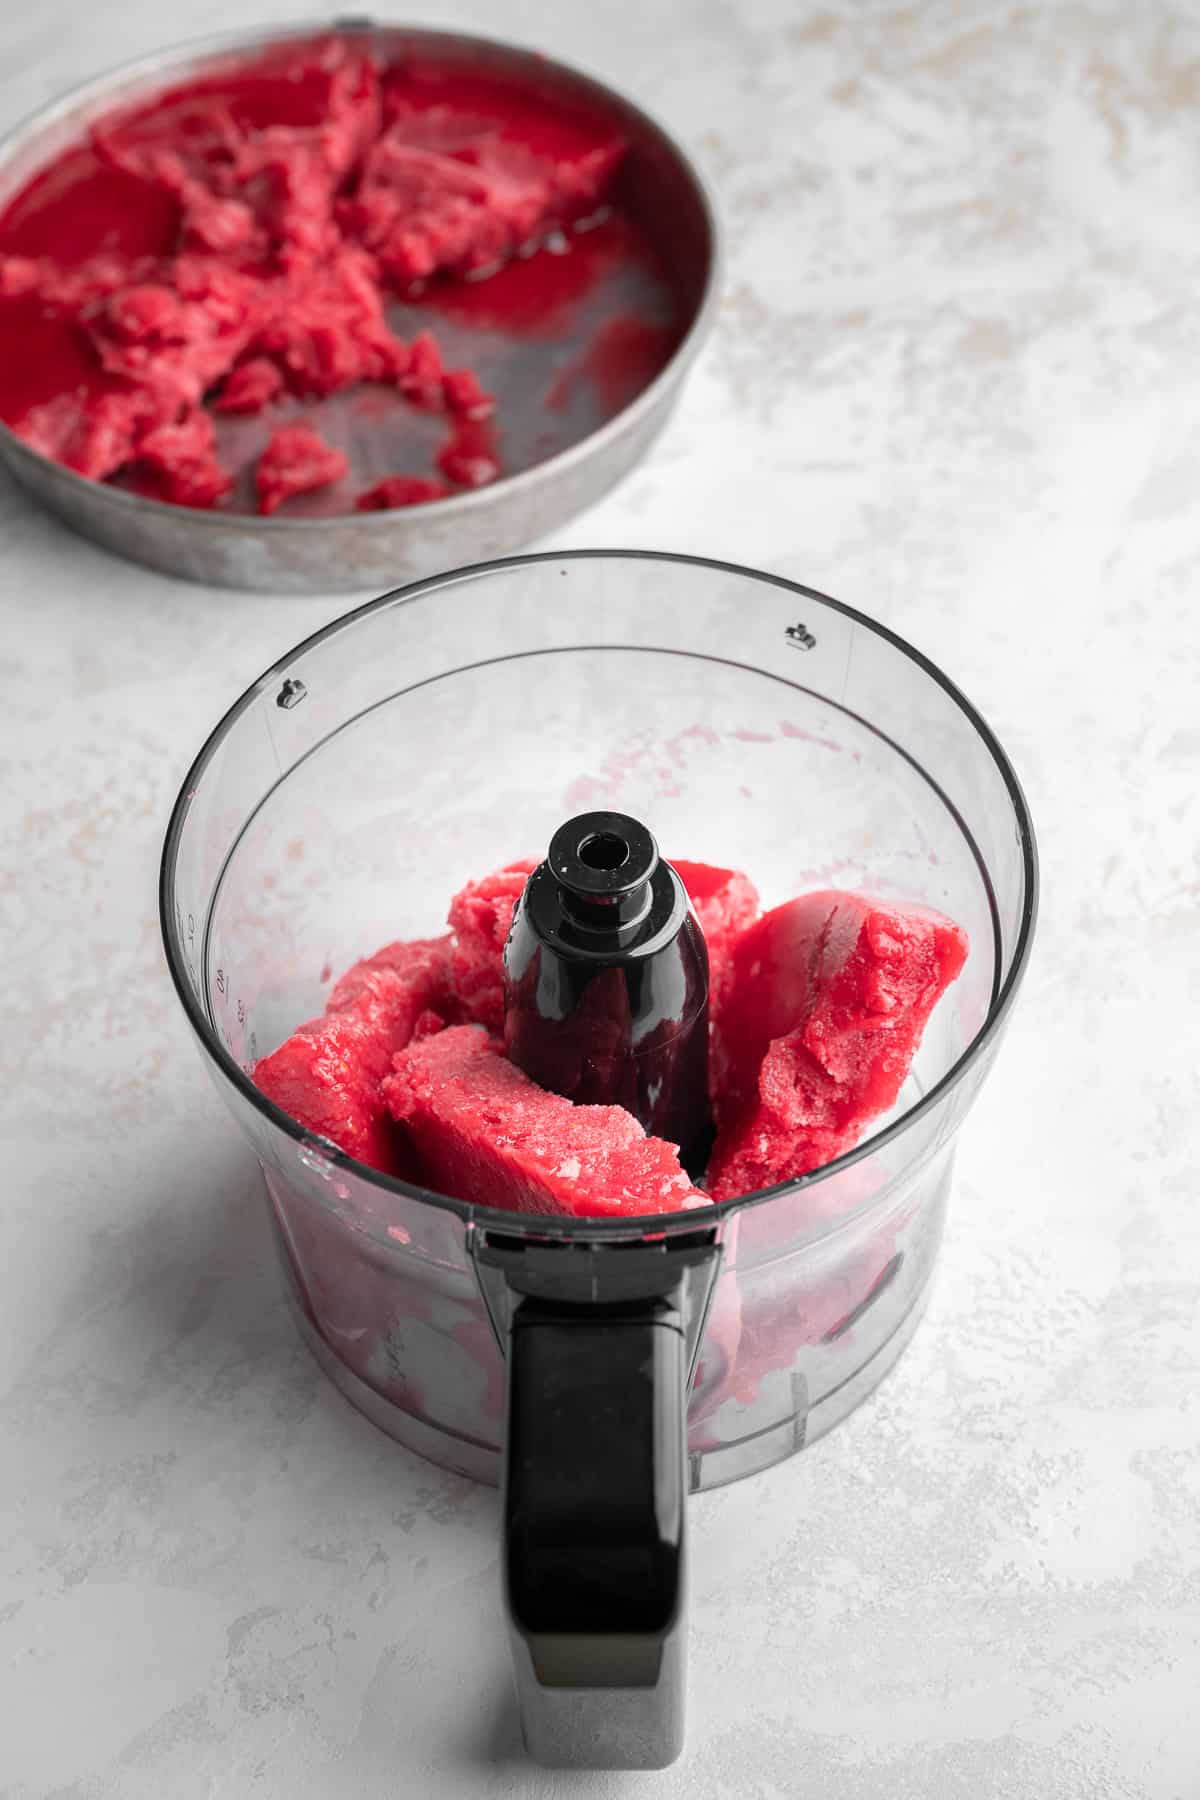
Step 4: Break up the icy sorbet using the back of a spoon and place back into the food processor. Blend until thick and creamy.
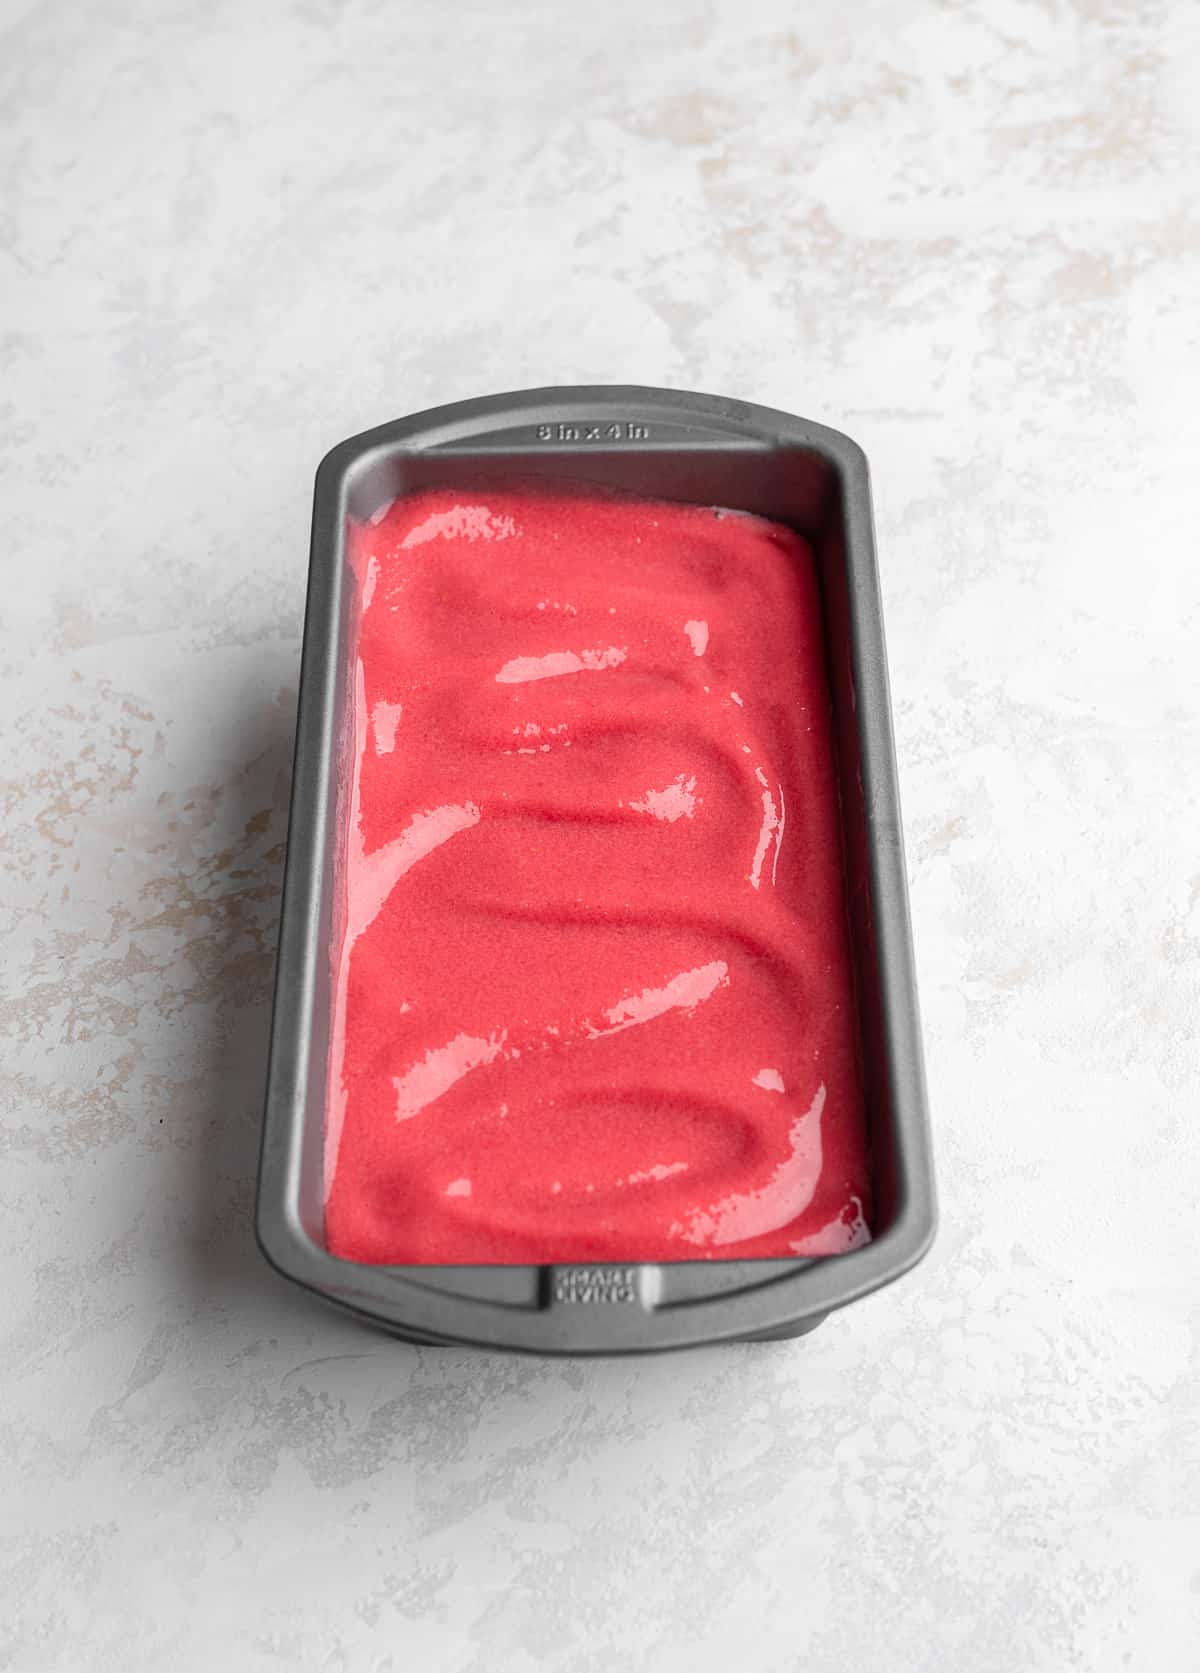
Step 5: Either enjoy right away or transfer the sorbet mixture into a loaf pan and freeze until solid enough (about 1-2 hours)!
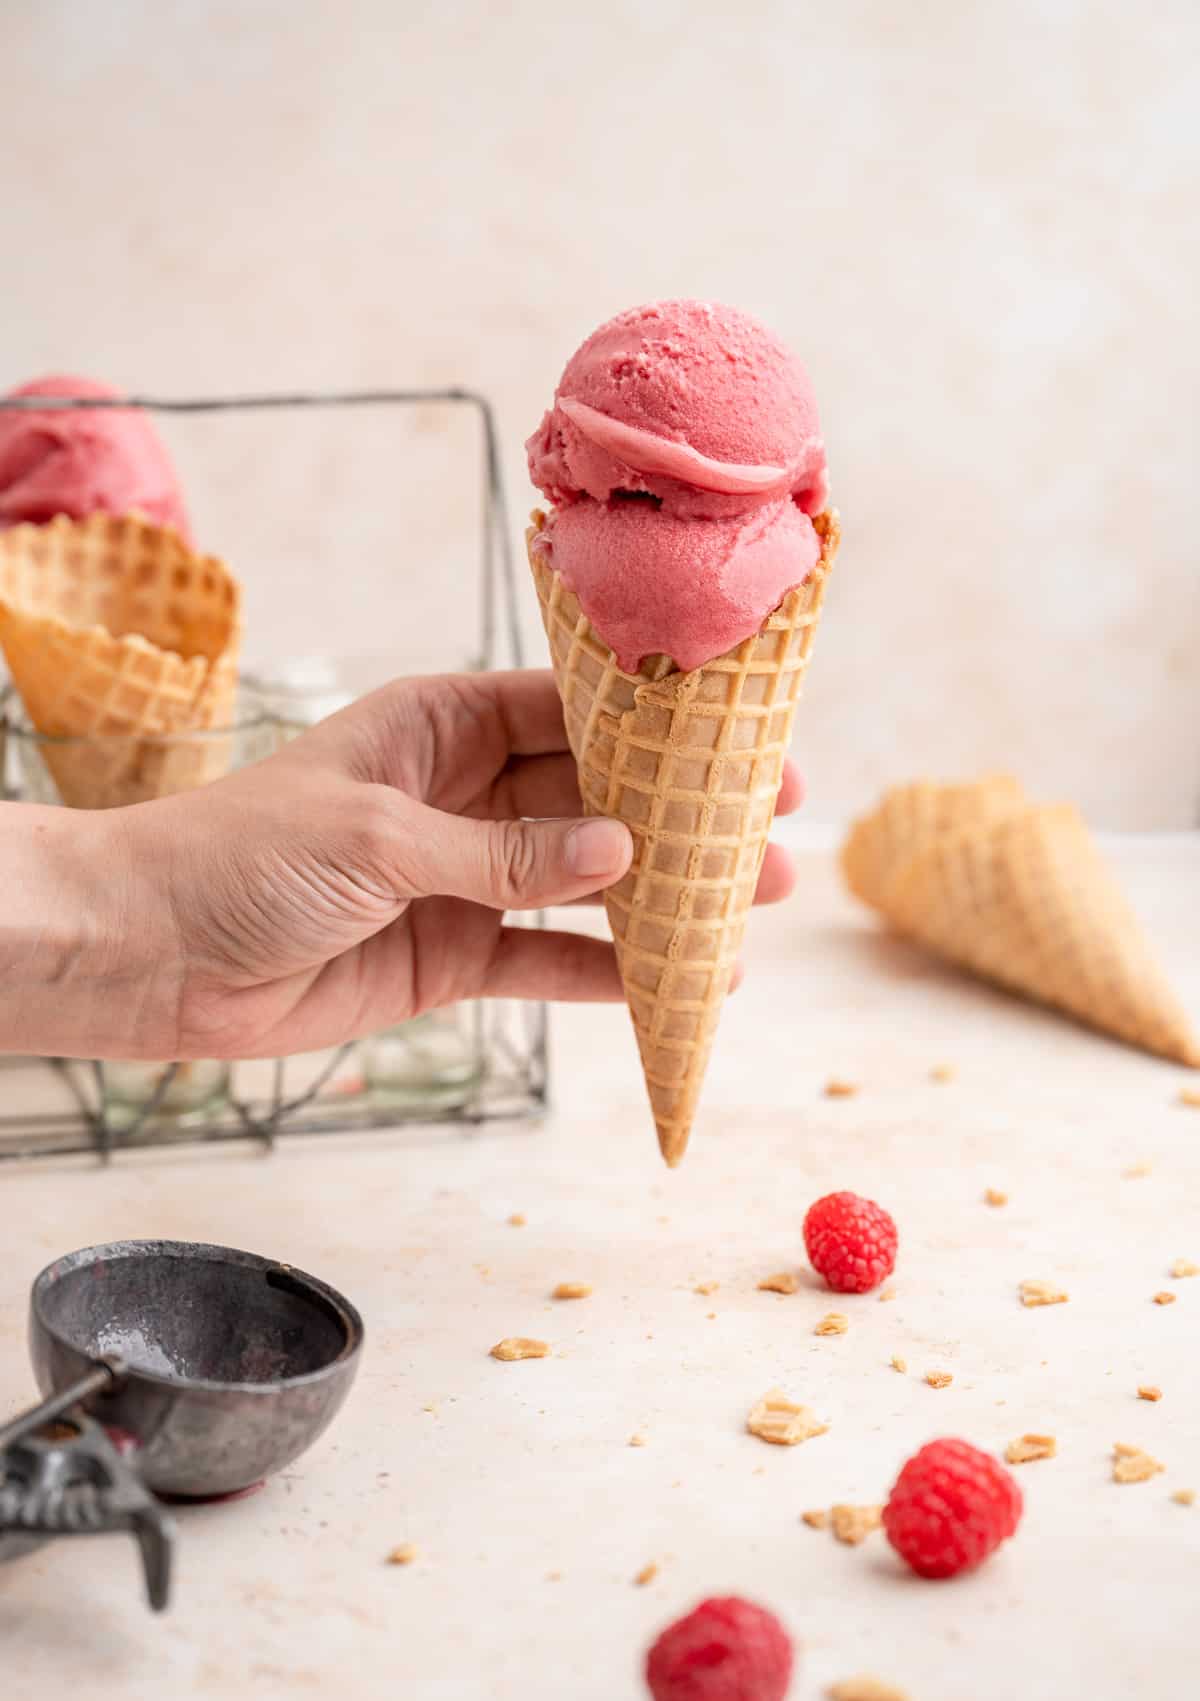
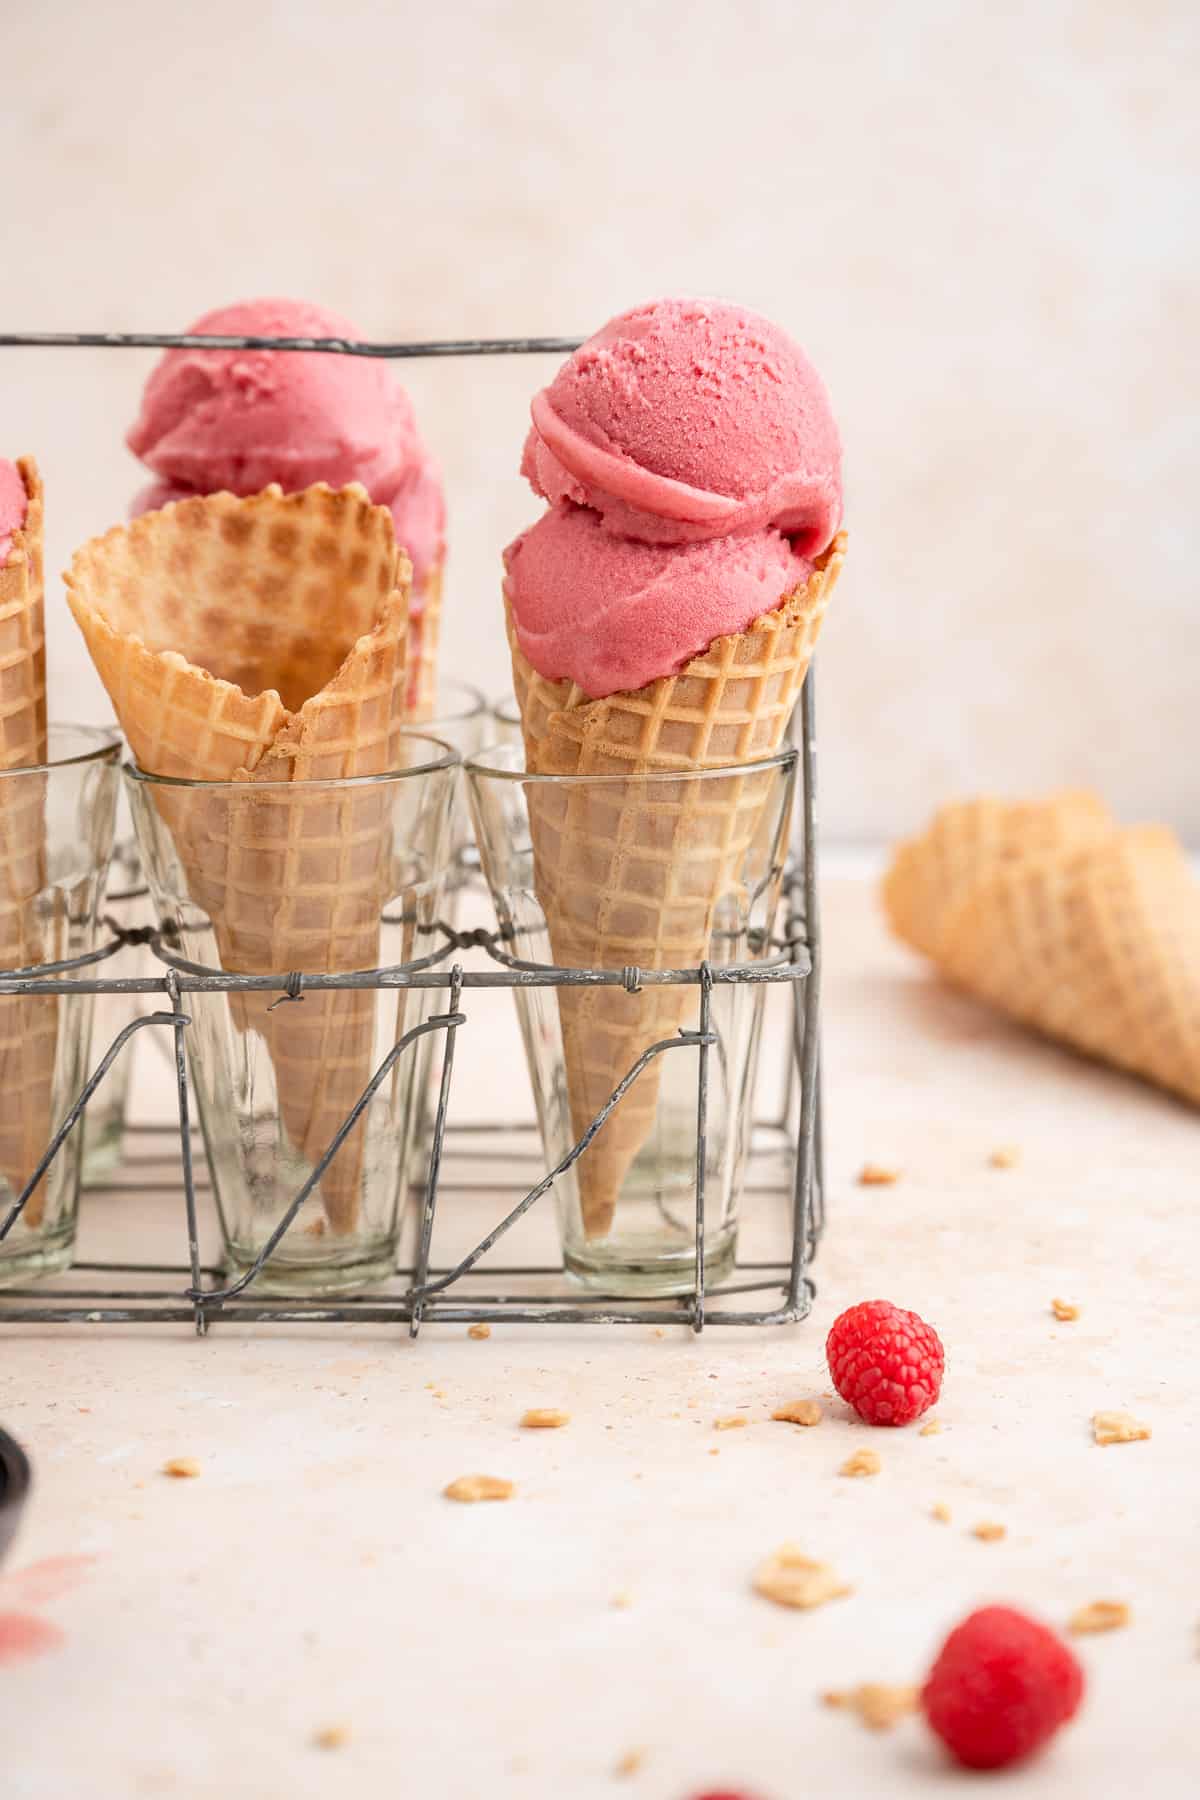
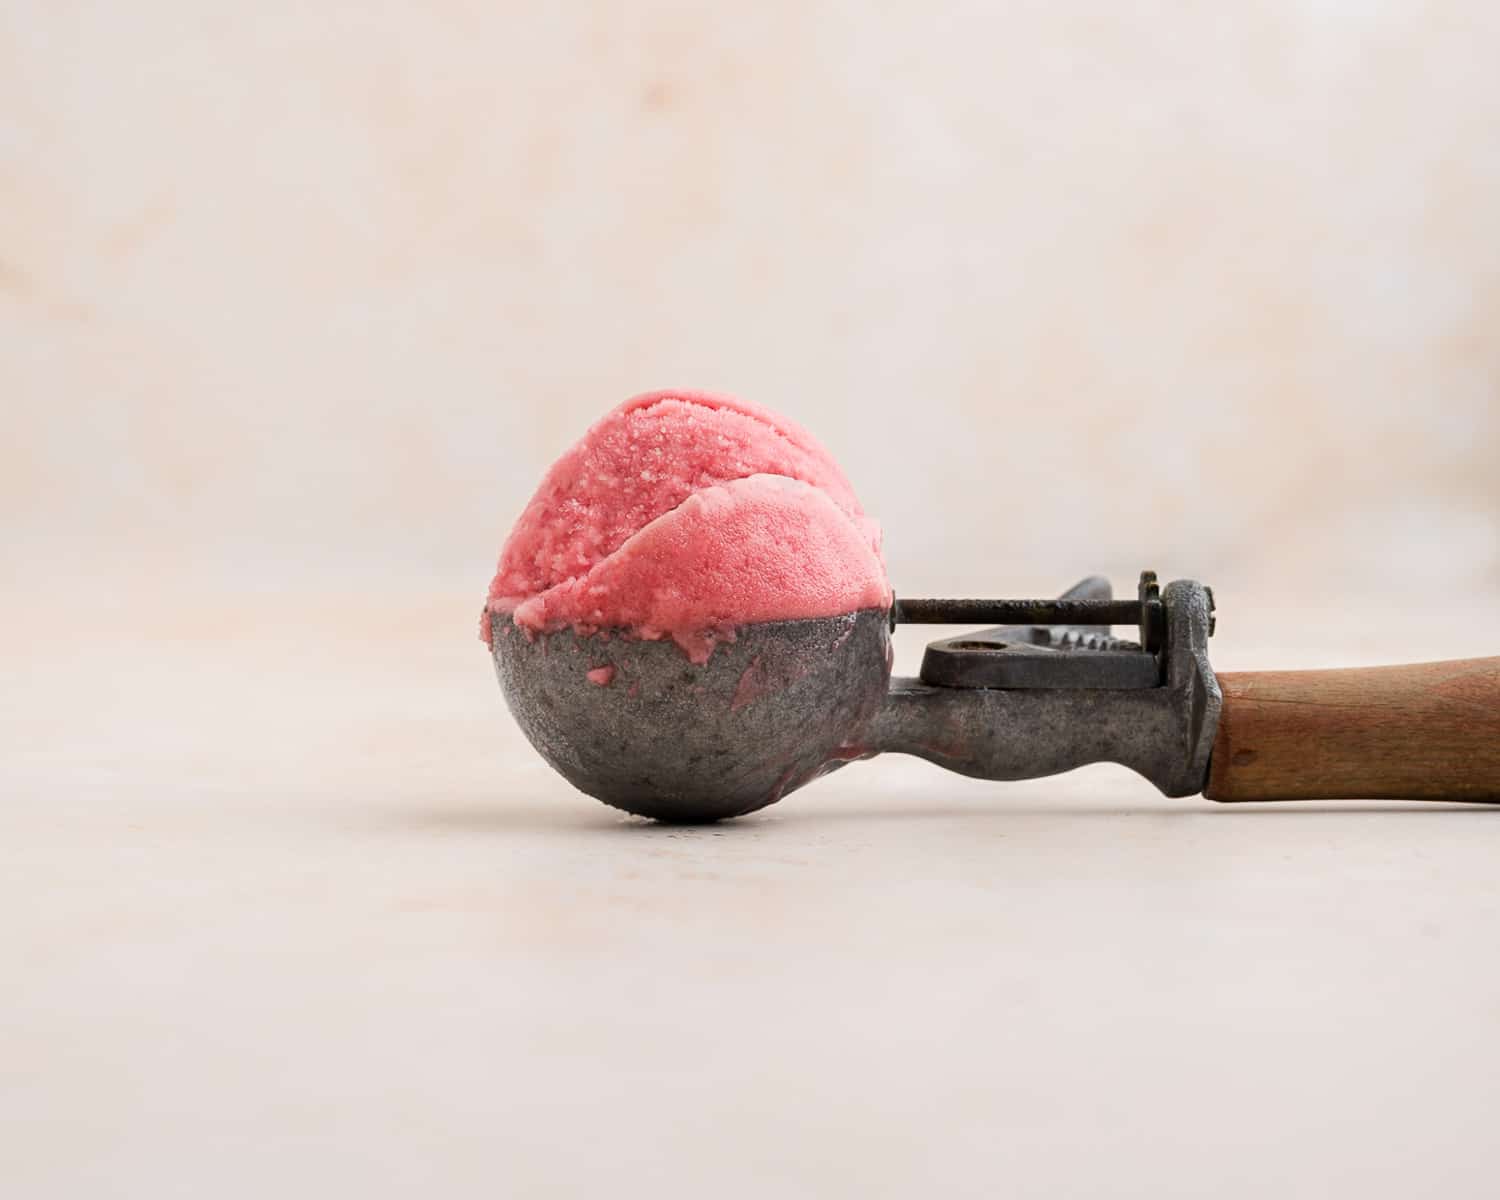
Step 6: Enjoy in a cone or bowl!
Expert Tips
These are just a few easy tips to ensure your sorbet comes out perfectly!
- Strain the sorbet before freezing it. Even if you don't use raspberries and are using a different berry, still do this! Leaving the seeds in takes away from the signature creaminess of a sorbet.
- Don't change the amount of sugar. This exact ratio allows the sorbet not to be too icy, while still being able to freeze.
- If you double or triple this recipe, make sure you work in batches to ensure everything fits in your food processor.
- If you use a blender, you'll have to let it blend for an additional 2-3 minutes.
- Frozen raspberries hold more water than fresh raspberries so if you're using them blend them first without any water, as you may not need as much or any at all.
- Don't use ice. If your sorbet is "too watery," freeze it for 30 minutes before serving. DO NOT add ice, as it will make the sorbet icy rather than creamy.
- Use a food scale. I always recommend investing in a food scale, so your baked goods and homemade sorbet are perfect every time. This ensures that the ratios are correct because it's sometimes hard to measure fruit accurately in a measuring cup.
- You don't have to double blend but I recommend it for a creamy sorbet rather than an icy sorbet.
Storage
Leftovers should be stored in an airtight container in the freezer for up 1 month. Beyond that, the sorbet will start to get very icy. When you are ready to enjoy, allow the sorbet to sit at room temperature for about 15 to 20 minutes for easy scooping.
FAQ
Fruit that are high in pectin, like berries, are high in viscosity. Meaning that their liquids when pureed are thicker, helping to make a nice and creamy sorbet.
In comparison to ice cream, sorbet does not use any milk or cream and is overall lower in calories and fat.
The no-churn method can cause a sorbet to be too icy. Just be sure to freeze, break it up, blend it, and freeze again. Also, do your best to not change the amount of sugar, as lowering the amount could make it even icier.
The major difference between the two is that sherbet is made with dairy while sorbet is not.
Other recipes you might like


Be sure to leave a comment and ⭐️⭐️⭐️⭐️ star rating down below if you try this recipe! Subscribe to my newsletter and follow along on Instagram for more recipes and updates.
📖 Recipe

Raspberry Sorbet without Ice Cream Maker
Ingredients
- 4 cups (490 g) fresh raspberries
- 1 cup (240 g) water
- 1 cup (200 g) sugar
- 2 tablespoons (24 g) lemon juice
- 1 teaspoon vanilla
Instructions
- To a food processor, add raspberries and water. Blend on high for 2 minutes or until fully puréed.4 cups fresh raspberries, 1 cup water
- Place a fine mesh strainer over a large bowl and pour the raspberry puree through. You may need to gently push/scrape the purée through the strainer using a rubber spatula. Discard the seeds.
- Add the raspberry puree along with sugar, vanilla, and lemon juice to a food processor and blend for 1 minute. It will be watery!1 cup sugar, 2 tablespoons lemon juice, 1 teaspoon vanilla
- Pour the sorbet into a loaf pan and freeze until solid.
- Optional but highly recommended for a creamy rather than icy sorbet: Break up the frozen sorbet easily with a spoon and place back into the food processor. Blend for 2-3 minutes, or until the sorbet is thick and creamy. Place back into the loaf pan and freeze again until scoopable (about 1 hour)!
- Serve in a bowl or on a cone and enjoy!


Emma says
This was really great and the second blend did make all the difference. 1 cup was too much sugar for me though - I wanted a tart raspberry flavour. I recommend starting with 1/4 cup, tasting, and working your way up!
Lauren Casolaro says
This is great to know!! So glad you enjoyed it 🙂
Colleen says
Could use use some honey and lessen the refined sugar amount? What would that ratio be without losing the consistency?
Lauren Casolaro says
You can use honey or maple syrup instead of the refined sugar at a 1:1 ratio. Using a different will ultimate change the consistency of the sorbet! For example, using less will make it more icy, too much and it won't freeze properly.
Marilyn says
While on a recent vacation I had raspberry sorbet at a fancy restaurant and loved it so much I decided to try making it at home. This recipe absolutely nailed it! Exactly the same as I had in Edinburgh. I’m definitely going to have this the next time I have a dinner party.
Lauren Casolaro says
Hi Marilyn, thank you so much for your kind review!! I'm so so happy you loved this recipe!
Lili Angel says
I had mixed frozen berries on hand and it turned out beautifully. Great recipe. Thank you!
Lauren Casolaro says
Hi Lili! So glad you loved this recipe and were able to make it successfully with mixed berries!
Marci says
Thank you for this recipe! I would like to serve it to a group of 16 at a dinner party. Can it be doubled successfully or is it better to make two separate batches? Please reply at your convenience. Thank you!
Pinch of Parsley says
Yes, this can be doubled successfully! I hope you all enjoy! 🙂
Veronica Mason says
This worked out perfectly! I did it with fresh strawberries and am thrilled with the results. I love that it didn't take any fancy equipment and I could use what I had in my little kitchen. It's perfect for a gluten free and dairy free dessert too! Definite 5 stars!🤩
Pinch of Parsley says
Ahh!!! Thank you so so much Veronica! I'm so glad you loved it and found this recipe easy to make!
Paige says
I am notorious for buying fresh fruit and then rushing to eat it all before it goes bad. I love that this recipe allows me to reduce waste and turn it into a yummy dessert! I've tried this recipe with raspberries and mango - each time it was light and refreshing year-round treat. Next time, I want to mix and match some flavors!
Pinch of Parsley says
Thank you so much Paige! Glad it worked well with the mangoes 🙂
Lauren says
oh my god. this is the best sorbet I've ever had and can't believe I easily made it in my little kitchen.
Jess says
This sorbet was AMAZING. I didn't have any raspberries so I used blackberries and OH MA GOODNESS it was phenomenal.
Pinch of Parsley says
Yay!!! Thanks so much Jess, I'm so glad it worked out with blackberries 🙂